Bluebeam enables Reviewers to leverage the view and markup functionality of Bluebeam Revu combined with ProjectDox for task, file, and markup management. The ProjectDox Bluebeam integration allows multiple reviewers to view and markup the same PDF file concurrently, as well as being able to have multiple PDF files open in Bluebeam at one time. When the marked-up PDF files are saved back into the ProjectDox project, the markup comments are copied to the database and displayed in the Review Comments list along with the thumbnail of the markup area to the Applicant to review and respond to. This process is similar to Changemarks created in the Brava viewer.
1. Navigate to the Project Template screen. (this can also be done in an active project)
2. Select a project from the Edit Existing: dropdown.
3. Click the Project Edit tab.
4. Select Enable Bluebeam checkbox.
5. Click the Save button. The Bluebeam tab will display.
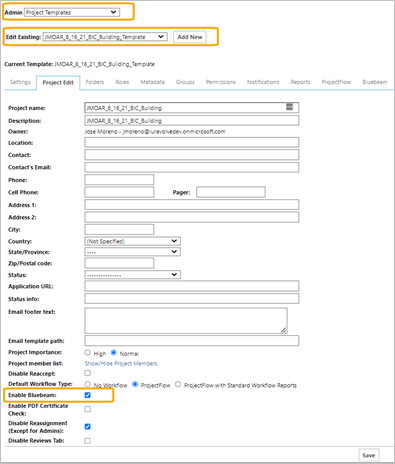
6. Select the Bluebeam Tab and configure settings.

a. Markup Layer Name
In Bluebeam, markups are added to a PDF layer. This layer needs to be named so ProjectDox will know which layer to look for from which to extract Bluebeam markups. The Reviewers need to agree and put their markup on that named layer for ProjectDox to extract and place the Bluebeam markups onto the Review Comments list. All Reviewers will need to name their Bluebeam markup layer the same name that is set up in this field. ProjectDox is going to look for that layer name to know what to import. Reviewers can create additional named layers in Bluebeam for adding review notes and comments to themselves, but these comments will not be added to the Review Comments list.
 If
a Reviewer does not use correct Markup Layer Name as defined in the
Bluebeam settings, ProjectDox will prompt the Reviewer, when saving
their Markup, to select the named layer where they saved their markup
to and then ProjectDox will extract their markup from that named layer
and add them to the Review Comments list.
If
a Reviewer does not use correct Markup Layer Name as defined in the
Bluebeam settings, ProjectDox will prompt the Reviewer, when saving
their Markup, to select the named layer where they saved their markup
to and then ProjectDox will extract their markup from that named layer
and add them to the Review Comments list.
b. Extract Markup Types
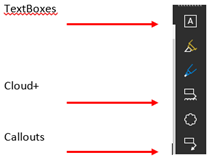
Below are the extract markup types and the only ones that will integrate with ProjectDox:
TextBoxes – a box where text can be entered.
Callouts – a text box with an arrow indicating information location.
Cloud+ - a cloud bubble with a text box and leader line indication information location.
The customer can use any Bluebeam markup type they desire, but they must also place one of these three markup types on the named markup layer next to any other markup elements in order to be properly extracted, added to the Review Comments list, and seen in ProjectDox. Only by using one of these three extract markup types will tell ProjectDox to extract that given markup area to be added to the ProjectDox Review Comments list. These are markups in Bluebeam that require text. Customer will need to decide which ones they want to use, it is recommended to select all three types in the Bluebeam settings, so the Review has all options available.
 For
example, a Reviewer can use any or all markup element types when marking
up a PDF file in Bluebeam; squares, circles, lines, text highlighting,
cloud bubbles, etc. when marking up, but the Review must also add
one of the Extract Markup Type elements (TextBox, Callout, or Cloud+)
so the ProjectDox Bluebeam integration will know to capture an area
thumbnail and extract that markup area and attach it to the project’s
Review Comments list.
For
example, a Reviewer can use any or all markup element types when marking
up a PDF file in Bluebeam; squares, circles, lines, text highlighting,
cloud bubbles, etc. when marking up, but the Review must also add
one of the Extract Markup Type elements (TextBox, Callout, or Cloud+)
so the ProjectDox Bluebeam integration will know to capture an area
thumbnail and extract that markup area and attach it to the project’s
Review Comments list.
Users must have Create Markups
permissions to use the Bluebeam option. Applicants and other users who
do not have Create Markups permissions will not see the Bluebeam Icon.
Files can only be downloaded to Bluebeam by a Reviewer when they have
an active department review task. When Bluebeam is enabled, and the user’s
group has Create Markup permissions, there will be a Bluebeam icon  on the file list.
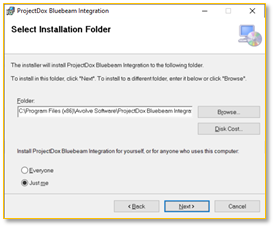
The first time a user selects the Bluebeam icon, it will prompt the user to download and install the integration components (client-side app) to their computer. This may require Admin rights, depending on the Jurisdiction’s security policy.
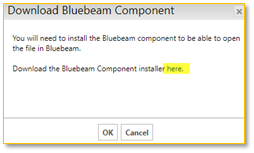
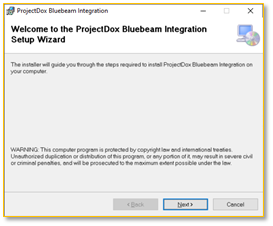
An .msi file will be downloaded and installed on the user’s computer.
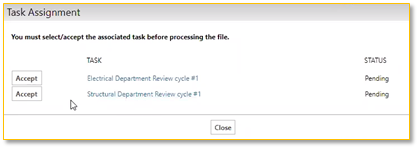
Accepting a Task
If the Reviewer has not accepted a task or has multiple, they must choose to Accept one of the tasks. This works the same as with Brava.
The Bluebeam download icon is only available to Users with Markup Permissions and an active “Review” type workflow task. Clicking the Bluebeam download icon next to the File Name on the Project Files list, will download a “copy” of the PDF file to the Reviewer’s local computer and open it in Bluebeam Revu. Only Reviewers with as accepted Review Task are allowed to do this. When the ProjectDox Bluebeam integration downloads a PDF file to the Reviewer’s local computer for review in Bluebeam, the PDF file is saved to a specific “BBFiles” folder. The PDF file should remain in this folder and all saves made to this file should be saved to this folder, otherwise the Bluebeam integration will not know where to look for the PDF file in order to copy the marked-up PDF file back into ProjectDox when the Reviewer select the Bluebeam Upload icon.
When a Reviewer “saves” their markups (saves the PDF file in Bluebeam) it is important that the Reviewer does a “Save” and saves the PDF file as the same name. If the Reviewer performs a “Save As” and changes the name of the PDF file, this will not allow the PDF file to be uploaded back into the ProjectDox folder when clicking the Bluebeam Upload icon. The PDF file being reviewed and marked-up must retain its same name as when it was downloaded and then uploaded back into ProjectDox.
Reviewers wishing to use the ProjectDox Bluebeam markup option,
must have a licensed copy of Bluebeam Revu installed on their local
computer. These Revu license are not provided by Avolve.
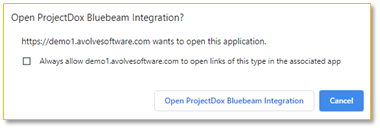
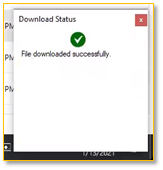
Two or more Reviewers can view and markup the same file at the same time. Downloading the file will not lock the file as “checked out,” allowing another user to click and download the same file as well for review and markup.
Bluebeam will open automatically and load the PDF file. TextBoxes, Cloud+ and Callout markup types placed on the Named Markup Layer, will be extracted, and saved onto the ProjectDox Review Comments list as a Markup. Other markup element types, like adding a rectangular box, circles and highlighted areas and text will also be seen in ProjectDox, just not added to the Review Comments list, unless one of the “extract markup types” (TextBox, Callout or Cloud+ element types) are used along with them, then they will be displayed on the Review Comments list.
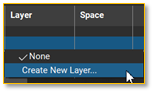
1. In the Markups List in Bluebeam, double click in the Layer field.

2. A pop-up will display. Select Create New Layer.
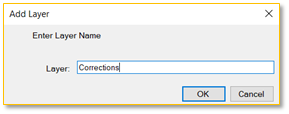
3. Name the Bluebeam markup layer “Corrections.”
The Markup Layer Name is configured in the project or project
template. Markups need to be placed on the layer named exactly as
configured in the ProjectDox Bluebeam settings.

4. It is important to do this for all Bluebeam markups, so ProjectDox knows which markups to extract and place on the Review Comments list. In ProjectDox, three conditions can happen:
If the markups in Bluebeam are not on a named layer, an error will display in ProjectDox saying markups do not exist when uploading the Bluebeam file back into ProjectDox, because ProjectDox is looking for a layer named “Corrections.” The Reviewer will need to reopen the PDF file in Bluebeam and add a layer name for their markups.
If the Bluebeam PDF file has multiple layers and none of the layer names match what was set up in the ProjectDox Bluebeam settings “Corrections,” the user will be presented with the list of PDF layer names and be prompted to select the layer name in the PDF that contains the Reviewer’s markups to be extracted.
5. Add the layer name to all Bluebeam Markups in the list that should be extracted and applied to the Review Comments list in ProjectDox.
6. Once the Bluebeam review is complete, SAVE and CLOSE the file. Do not use Save As. ProjectDox needs the file name to be exactly the same as when it was downloaded and located in the “BBFiles” download folder.
The ProjectDox Bluebeam integration will clean up the downloaded file(s) from the Reviewer’s computer if the markups are uploaded, extracted and the Reviewer is finished marking up the file in Bluebeam. If a Reviewer forgets to upload the PDF file back into ProjectDox, the ProjectDox workflow task will remind them of the downloaded PDF file when they attempt to complete their Review Task. Any PDF files that were downloaded for Bluebeam review and not uploaded back into ProjectDox, will be automatically cleaned up (deleted) from the Reviewer’s local BBFiles folder after 60 days of inactivity. These PDF files can always be downloaded again if needed.
The ProjectDox Bluebeam Integration keeps track of the downloaded file and knows where to put this file back into ProjectDox when the Review clicks the Bluebeam Upload Icon in ProjectDox.
1. Navigate back to the File List in ProjectDox.
2. Select the upload icon.

If
the file is still open in Bluebeam, a File Locked error message will
display.
3. Confirm your actions.
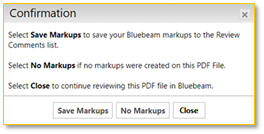
a. Save Markups: will prompt the Reviewer to save their markup file name and ProjectDox will extract the markups to the Review Comments list and the upload icon will change back to a download icon.
b. No Markups: select if there are no markups made in Bluebeam for this file and the upload icon will change back to a download icon. If you do click this button, the PDF file will be cleaned up on the Reviewer’s computer and if they did create markups, they will be lost.
c. Close: the Close option allows the Reviewer to cancel this confirmation screen and keep the PDF file downloaded for review in Bluebeam, allowing them to continue reviewing the file in Bluebeam and no comments will be saved to the Review Comments section.
4. When the upload is being performed, this message will display.
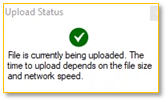
5. Name the Markup File in ProjectDox. This can be the Reviewer group name, for example. This is just like a Reviewer saving their markup in the Brava viewer.
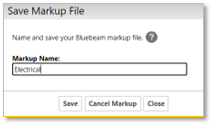
6. Click the Save button to upload markups.
Cancel
Markup will cancel the upload of markups and upload the file without
markups. Close will cancel the upload and allows user to go
back to Bluebeam.
Reviews Tab Functions in ProjectDox
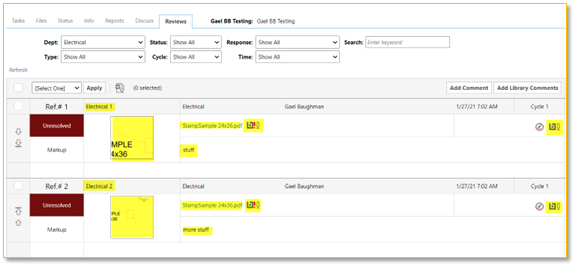
1. Icon to open marked up file in Bluebeam.

· Used when reviewer wants to add/edit their markups.
· Red exclamation mark denotes there are markups on this version of the file.
· Reviewer will click the Bluebeam Upload Markup icon when they are ready to upload the edited Bluebeam markup file.
· If the Reviewer edits the PDF in Bluebeam and then uploads it back into ProjectDox, we will not prompt user for a markup file name since it is already named.
· Click Refresh to see any changes.
2. Icon to open latest version in Bluebeam.
· Will not open previously created markups.
· This Bluebeam icon only opens the latest version of the PDF file without any markups.
· Typically used to review the latest version, like V2.

3. The Markup Name given by the Reviewer when the markup was saved, will be used to name, and number each Bluebeam markup added to the Review Comments list.
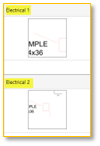
4. Comment text made for each Markup will be displayed. This comment text is coming from the Textbox, Callout or Cloud+ markups made in Bluebeam.
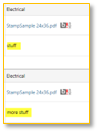
5. Thumbnail of the Markup will display and be viewable. The thumbnail is created when the PDF file is uploaded, markup name saved, and markups are added to the Review Comments list. The thumbnail is a saved view around the markup created in Bluebeam and is dependent on the zoomed area when the markup was created.
6. When the Applicant or Reviewer select the file name hyperlink, the Brava viewer will open with the Bluebeam markups displayed and functional like Changemarks in Brava.
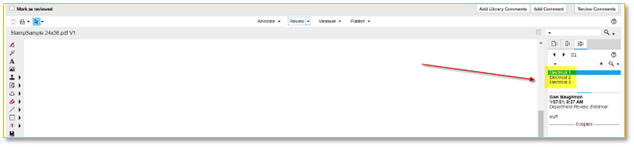
7. Applicant will use the Review Comments list to review their comments and provide responses back to the Reviewer. Applicants will not see or have access to the Bluebeam icons; they will only be allowed to view the PDF file markups in Brava or open/download the PDF file from their browser.