
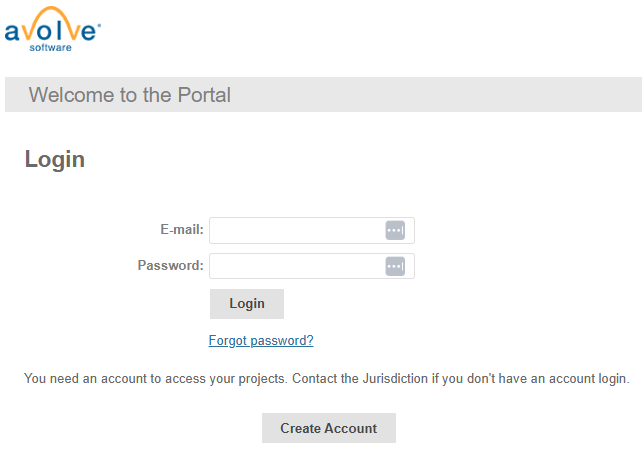
To manage projects in ProjectDox, you first need to create an account.
Navigate to the ProjectDox login page and click the Create Account button.
You will be redirected to a page to fill out all necessary information. Required fields are marked by a red asterisk (*).

Choose and set a password in the last two fields. The standard password requirements are as follows: Password must not contain special characters, must contain at least one digit, one upper case letter, one lower case letter, and must have at least 8 characters.
Click the Create My Account button. You will then be redirected to the verification page. This page requires a verification code to confirm your account.

You will be sent an email notification with the verification code to confirm your account.
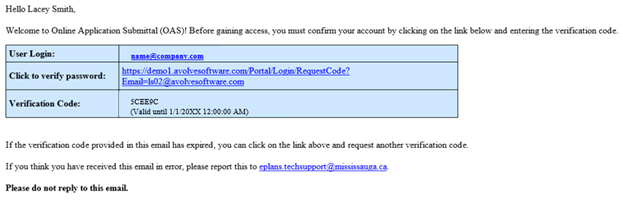
Copy and paste or type the code into the Verification Code field.
Click Continue.
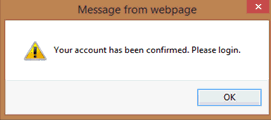
A pop-up will appear, indicating your account has been confirmed and you should log in. Click OK, and you will be directed back to the login page.
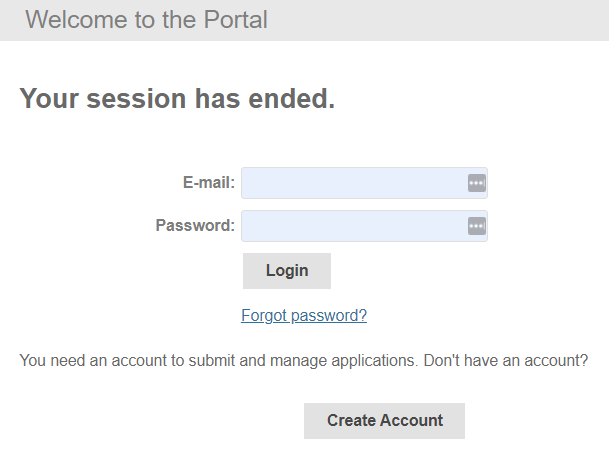
Type in your email and password you specified when creating your account, then click the Login button.
Password Reset
If at any time you forget your password, click the Forgot password? link under the Login button and you will be directed to the Request Password Reset Code page to follow steps 5-8 above. A name and email change can be initiated by clicking the Manage profile radio box before logging in.
![]() When
a new account is created in portal it will immediately create
an account in ProjectDox. If a user wants to change an email address,
the change must be made in both OAS and ProjectDox as the email is
not connected to both applications. If ProjectDox Workflow is
enabled in ProjectDox then the user is prohibited from changing their
email address in ProjectDox. The OAS userID remains the same
so the updated email and will be linked to the ProjectDox email.
When
a new account is created in portal it will immediately create
an account in ProjectDox. If a user wants to change an email address,
the change must be made in both OAS and ProjectDox as the email is
not connected to both applications. If ProjectDox Workflow is
enabled in ProjectDox then the user is prohibited from changing their
email address in ProjectDox. The OAS userID remains the same
so the updated email and will be linked to the ProjectDox email.
Logging in to ProjectDox a second time (and every time after that); you will use the password that you entered in your User Profile page. After logging in, you will be taken to your homepage. From this page, you can view the projects you have been invited to and all tasks for you to complete.